Monday, January 25, 2010

Travel Felt Board


Directions:
It's not really a board, rather it's a piece of fabric I backed with iron vinyl and then sewed to a piece of felt. The vinyl is essential to keep the backside from getting all dirty, especially at restaurants while we wait for our dinner at fancy shmancy places like Chilis, because I really don't want every meal out to come on a plastic tray!

To make one is really simple and I've improved the design since making mine to include a ribbon closure:

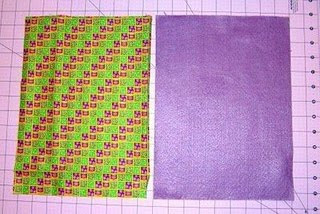
Cut a piece of fabric to the same size as your piece of felt, I just used the very inexpensive felt sheets that come pre-cut. They are the perfect size for rolling up and keeping in your bag without taking up too much room.


Cut piece of iron on vinyl to the same size as your fabric. Follow the directions on the package and iron onto the right side of the fabric. Let it cool off before moving on.


I found iron-on vinyl sold by the roll in a plastic bag on the notions wall at Joann's Fabric, a large nationwide fabric and crafting retailer. Watch for special sales where the entire notions wall is 40-50% off and same yourself some money!
----
Pin and sew vinyl covered fabric to felt, with vinyl covered side facing the felt. Before beginning attach ribbon.

On one side pin a piece of ribbon folded in half so that the loose ends are sandwiched inside between the vinyl covered side of the fabric and felt. Leave a bit of the loop formed when folding the ribbon in half sticking out between the pieces of fabric. When you are sewing around your "board" catch the ribbon and sew firmly into place by sewing over, back-stitching, and then forward stitching over it. This will become your tie.

Turn inside out and sew opening shut. My beginner skills are evident by the obvious stitching up the bottom right side on the one above but it still looks cute all rolled up! Use fabric scraps to make the felt shapes and you're in business! Your toddler is kept busy, and when she's all done just roll up the whole thing, tie closed, and now you don't even need a plastic bag to keep it in!


Found this great idea at katiesnestingspot.blogspot.com

Pencil & Drawing Pad Holder

This is a fun colored pencil and drawing pad holder made from an old pair of jeans. This is a such a cute idea. You can get more images of how to make it at www.skiptomylou.org
Inside with plenty of space for all the pencils and a note pad.

Felt Brown Paper Bag Lunch


This is a fun felt brown bag with all of the goodies.

The Brown Paper Bag

You need two pieces of light brown felt. Cut a square out of the bottom corner on each side. With pinking shears trim across the top. Trim just enough to pink the top. Sew across the bottom and along each side. Then Pinch the side and bottom together and sew. And then its Finished!

The Chip Bag and Chips

Cut two pieces of felt. Embellish the front with stripe and medallion. I meant to embroider "chips" in the white circle. You could also write chips with a paint marker. Then place right sides together and stitch along each side. Turn right side out and then stitch across the bottom. I used a blanket stitch along with a couple rows of stitching. Next cut chips out of yellow felt. Stitch together close to the edge. You can add rows of stitching to make them 'ruffled' chips if you like.


The Ho Ho

Cut 2 pieces if dark brown felt and two pieces of white felt. Then place the pieces together and sew around the outside edge, leaving an opening for turning on the short side. Next turn right side out. Top stitch around the edge on the white piece only. Don't worry about closing the openings--they will be in the center. Place the white piece on top of the dark brown (bottom edges lined up) and roll up. And finally slip stitch the roll closed along the outside edge.

The Sandwich

Cut two pieces of off - white fabric and a strip of light brown felt about. You might need to attach two pieces together.
Sew the strip to one side of the white square overlapping the ends.Sew the white square to the other side leaving an opening for turning.Turn right side out. Stuff with polyester fiberfill and slip stitch opening closed.

Make ingredients for your sandwich by sewing two of each color together. You can sew around the edge leaving an opening for turning, turn and topstitch or just sew the pieces together (this is how I made them except for the bologna which I turned). Add details with your machine.

This Idea was from www.skiptomylou.org

Felt Easter Goodies


This are so cute! I just love these little felt peeps. And the cute little Easter basket is so good you could almost eat it. LOL

Found this great idea at a blog called Dusty Bottom Acres.

Cardboard box Kitchen


Materials:
Large cardboard box(es)
Masking Tape
Paint or paper
Twine, rope, or ribbon
Top of ketchup, milk carton, or other small lids
Utility knife
Markers
Old CDs
Bowl for sink
Plastic piping
Glue

Instructions:
Step 1: Finding boxes
Finding cardboard boxes is easy. Go to the local grocery or electronics store and ask for their discarded shipping boxes. Have an idea of which kitchen appliances are going to be made and get a variety of sizes and shapes to match. A tall box could be used for a refrigerator or laid on its side for a sink and counter. Smaller boxes can be used as a microwave or over-the-sink cabinet. This is where the 'child in the adult' comes alive with imagination.

Step 2:Play Kitchen Appliances
Tape the boxes shut with masking tape and arrange them, in the area where they will be played with, in a basic shape of a kitchen. Use the kitchen layout in the house to create a realistic atmosphere. When the boxes are in place then decide which boxes will be transformed into what kitchen appliance

Step 3: Complete Play Kitchen Set
Use paint, construction paper, or butcher paper to cover the exposed area of the boxes. Let the kids helps since making the play kitchen is half the fun. With a utility knife cut the holes for the kitchen sink, the oven, microwave, refrigerator doors, and any cupboard (explained below). Begin adding detail to each box with these suggestions.
• Use old cake pans, plastic storage containers, or pre-formed tin cooking pans for the kitchen sink. Trace around the sink container and cut a hole a little smaller. Use plastic piping for the faucet and glue covers from milk cartons on either side for the hot and cold controls.
• Glue four old CDs on the top of the box for the stove top. Use covers from old ketchup bottles as the burner controls and add temperature control marks (off, low and hot) on the box surrounding the controls.
• For the oven, on the front side of the box, cut across the top and ½ way down on both sides, to form the oven door. Place tin foil on this pull down door to represent the window to look through. With a screwdriver punch two holes at the top of the door and use heavy string, twine, or ribbon to make the pull down handle. Put a knot at one end, poke out through one hole and over to the other. Poke in through the second hole and tie another knot.
• A bottom cupboard is made with a box that is on its side or at a height correct for the child to use as a work space. Use a marker to show where the doors would be and be creative with the pull knobs. Do not cut the doors so this box remains firm.
• Place a box for the microwave on the cupboard. Starting in the middle of the box cut across the top, bottom and the right side to create the door. Use your choice of a knob or pull for the handle. On the left side use a marker to draw buttons with numbers on them and other controls such as 'Defrost' and 'Popcorn'. Make sure there is a box drawn for the clock/timer.
• Elaborate on the refrigerator as much as wanted. Cut the door and put a handle on it or cut out small ovals to pull the door open. Inside stack several boxes on top of each other, each with the front cut out. This will create shelves inside.

Rolled up Kitchen Mat


Materials:
A piece of wool felt 17.5″ x 9.5″. (Two pieces if you’re going to be hand sewing. Just one if you’re machine sewing.)
A piece of cotton print fabric 17.5″ x 9.5″. (Skip this if you’re hand sewing.)
A 23″ long length of ribbon.
Assorted wool felt scraps for the burners, knobs, sink, and faucet pieces. See pattern for how large the pieces are.
Matching thread.
embroidery thread for hand sewing the kitchen items onto the playmat and/or hand sewing the playmat to its backing


1. Cut & Pin:

Cut the burners, knobs, faucet pieces, and sink out of your choice of wool felt colors and arrange on your 17.5″ x 9.5″ piece of wool felt. Make sure you leave enough room around the edges for sewing the playmat to its backing, you want there to be a bit of a border left after you sew, plus allow for the 1/4″ seam allowance (if you’re machine sewing).

Pin in place… I know my printed fabric is shown underneath in the photo, but ONLY pin through the wool felt. (And only pin through ONE layer of wool felt if you’re hand sewing everything.)

Sew the kitchen elements on
You can sew the kitchen pieces to the wool felt however you wish. My new sewing machine has a blanket stitch so I used that. You can just do a straight stitch or a zig zag if you’d like. Sewing wool felt pieces by hand is quite enjoyable if you like handiwork. You can use embroidery thread and stitch everything on by hand either by a running stitch or a blanket stitch, however you wish.

2. Stitch playmat and ribbon tie
After all the kitchen elements are sewn on, you’re going to want to stitch the playmat to its backing.

If you’re sewing with a machine:
Lay your wool felt playmat piece right sides together on top of your printed cotton fabric and square up the edges if you need to

Pin pieces together inserting your ribbon folded in half on one short end. Most of the ribbon should be inside the playmat pieces, pin it in there if you’re afraid of accidentally catching it in the stitching

Using a straight stitch, sew around the edge of the playmat with a 1/4″ seam allowance. Leave a 3 or 4 inch opening to turn the playmat right side out.

Clip corners and turn the playmat right side out. Use your fingers or a chopstick to poke the corners out. Iron on a warm setting if needed.

Fold the edges of the opening in, pin. Topstitch close to the edge closing the opening and going all around the edge for a neat look.

If you’re hand sewing
Lay your wool playmat piece with the kitchen elements sewn on, on top of another wool piece of the same size face up — wrong sides together. Square up if needed. Using embroidery thread, sew pieces together either with a running stitch or a blanket stitch. Your stitching will show, so if you do a running stitch, do it fairly close to the edge. Wool felt won’t fray, so don’t worry.

Don’t forget to insert your folded ribbon between the layers (folded end hidden between the layers, loose ends free to tie the roll up), on one short end of the playmat and stitch it tightly in place
******************************************
That’s it! You’ve got yourself a sweet little portable play kitchen for hours of creative play for your little ones. These would make very cute handmade Christmas gifts with a wee wooden spoon and a tiny pint-sized pan or two

alterations, changes
I always recommend using wool felt over the thin, acrylic stuff you can find in craft stores. It just holds up so much better folks. Wool blend felt is perfectly okay! If money is really tight, anything that won’t fray easily like polyester fleece would work as well. You could also make the whole thing out of cotton prints with some iron-on fusible webbing (like Wonder Under), easily found at fabric stores. You’ll just want to sew the edges down VERY WELL to avoid fraying.

You can also take it a bit further, and embroider “hot” and “cold” onto the faucet knobs, or maybe “on” and “off” on the burner knobs. It would be cute to do a red spiral stitch on the burners or even a red spiral bit of wool or fleece to make the burners look hot.

You could add a splash or a drip of water under the faucet… add a drain or some bubbles in the sink… embroider a little 3D sink action… there are lots of fun possibilities!

Found this great idea from www.balancingeverything.com

Sunday White Shirt & Tie for Baby Boy


This are so darn cute! I just love these. I can't wait to get my sewing machine fixed so I can make a ton of these to give as baby shower gifts. It is really simple to make even though if you try to buy them you will be paying at least $20. Which is rediculus! All you need is a plan white onesies, some fun fabric, wonder-under and a sewing machine. Just create a tie like pattern on some card stock and then cut out the fabric using that same shape. Iron on the wonder under to the fabric and then iron on to the shirt. To make sure the fabric doesn't come off of the shirt just stitch around the tie. It looks really good if you do a really tight zizac.

Crayon Rolls


This is easy to make and its nice to have a place for each crayon. Its also nice because you can figure out quickly if you are missing one. This is a really cute idea and great for taking crayons on the go with you!
You could make this for markers if you wanted to, just make each little pocket bigger.

Sunday, January 24, 2010

Take a long Chalk Board


This is a picture of a take along chalk board that my mother made for my son. I just love it and he does too! It is a really great activity for him to do when he needs to sit still and be quiet (like at church). I just love this idea and it is great to have the erase attached as well as a pocket to put the chalk in. That way you don't have to search around for those supplies. I LOVE THIS!
Posted by Picasa

Towel Birthday Cake


This is a towel birthday cake that we placed birthday pencils in to help celebrate the birthdays of the kids in our primary at church. My hubby rolled it up since he is the "expert sleeping bag roller" and did a great Job of fitting it on the plate. I decorated it with ribbon and then added the fun colored pencils. To help hold it in place I used big rubber bands and hot glue. All the kids and adults were impressed when I walked in with this.

Easy Christmas Gift Ideas


This is a fun idea where you take a Chinese take out box and fill it with fortune cookies. Then add chop sticks and fun ribbon or raffia as well as the saying," We are so fortunate to be your Friend" or some thing like that.
 

The second gift is a shaker full of sprinkles with the saying, "Sprinkles...because its easy to add a bit of magic"
 

The last one is a fun colored reusable shopping bag attached is the saying, "May the New Year bring you all the joy you can carry."

Cake- Flowers and Family


This is a butter cream cake which is really colorful because I wanted to use the rest of my frosting. I really liked this cake but didn't have time to finish the family's faces or hair. O well! LOL It is still cute!
Posted by Picasa

Treasure Chest

I made two of these fun treasure chest. The first one was to hold my little ones build a bear costumes. His bear had a lot of little outfits but I had no where to put them. This was fun to make and he seemed to like it too.
 

The second one I made was for Primary at church. I made it and told the kids that this is to help us remember to share the "treasures" of the gospel. I placed all the kids names in it and we would pull kids names out randomly to help with talks, scriptures and prayers during church. The lock has velcro on the back and will velcro shut.

Both were made from clothes detergent (sun brand) boxes that I cut, glued, painted and decorated. It was really simple just took a little bit of time.

Thank You Primary Teachers

These are a few examples of treats we gave our Primary teachers just to say thanks. Without them we would have a lot of stress and frustration.


Posted by Picasa

Articles of Faith

This is a great idea to help your Primary kids to be motivated to memorize the articles of faith. Each letter stands for a article of faith and when a child passes one off to you they then get to write their names on the letter. This phrase is out in the room so all the kids can see. Its a great way to motivate and keep track of the kids memorizing the 13 articles of faith.
 

Friday, January 22, 2010

Traveling High Chair


3 rectangles of fabric and some velcro ... no biggie. Right?

Three rectangles! I cut my waist strap to be 6" x 43", but if I were to do it again, I think I would make it about 6 inches shorter (6" x 37"). It doesn't need to be quite so long.

The connector piece is 6" x 4". The seat piece is 20" x 10". There is a thin layer of batting between each piece, and a long strip of velcro on either end of the waist strap.

Gifts in a Jar


1. S’mores in a Jar
Kids love to help make and eat S’mores in a Jar. If you’re into seasonal gift recipes, find some marshmallow Peeps to match your holiday.

Or get fun and use teddy bear graham crackers to line the jar for decoration.

Ingredients:
Layer in a large wide mouthed 1 quart mason jar:

1 1/2 cups graham cracker crumbs (one sleeve of crackers, crushed)
1 1/2 cups miniature marshmallows.
Or substitute with 8 Peeps and 1/2 cup miniature marshmallows for seasonal fun. Line the jar with Peeps facing out.
1 1/2 cups chocolate chips or mini Hershey Kisses or M&M’s
1/3 cup brown sugar
________________________________________________________________________

2. Oatmeal Chocolate Chip Cookies in a Jar
This recipe makes about 36 cookies.

Ingredients:
Layer in a large wide mouthed 1 quart mason jar:

1 cup all-purpose flour
1/2 tsp baking powder
1/2 tsp baking soda
1 1/4 cups rolled oats
1/2 cup white sugar
1/2 cup brown sugar
1/2 cup chopped nuts
1 cup semisweet chocolate chips
Mix flour, baking powder, and baking soda. Pour mixture into a 1 quart (1 liter) mason jar and pack down. Mix oatmeal in a blender. Pack on top of flour in mason jar. Add white sugar and pack down. Add brown sugar and pack down. Layer chopped nuts on top of brown sugar. Finish layering jar with mini or regular chocolate chips.

_______________________________________________________________________
3. Ultimate Chocolate Brownie Mix in a Jar
This recipe makes one pan of chocolate brownies.

Ingredients:
Layer in a large wide mouthed 1 quart mason jar:

1 cup all purpose unbleached flour
1/2 tsp baking powder
1/4 tsp salt
1 1/2 cups vanilla sugar
1/4 cup unsweetened cocoa powder
Any combination of: mini chocolate chips, mini M&M’s, junior mints, chocolate candy bar
1/2 cup almonds
Layer ingredients in 1 quart mason jar. Tap gently on the counter after each layer before adding the next. Add additional mix-ins to fill any small gaps if necessary.

______________________________________________________________________

4. Chocolate Chip Muffins in a Jar
This recipe makes a single batch of muffins.

Ingredients:
Layer in a large wide mouthed 1 quart mason jar:

1/3 cup sugar
2 cups all-purpose flour
1 teaspoon salt
2 teaspoons baking powder
1 cup chocolate chips, or substitute raisins, dried cranberries, or nut.
Combine sugar, flour, salt, and baking powder. Place in quart mason jar. Add chocolate chips.
________________________________________________________________
6. Chicken Noodle Soup in a Jar
This recipe makes a pot of soup.

Ingredients:
Layer in a 1/2 quart (2 cup) glass jar:

1/4 cup of red lentils
2 tbsp dried onion flakes
1 1/2 tbsp chicken bouillon granules
1/2 tsp dried dill weed or dill seed
1/8 tsp each celery seed and garlic powder
1 cup medium egg noodles
1 bay leaf
In a 2 cup glass jar, layer from bottom in the order listed above.


printable gift tags at:
www.squawkfox.com

Felt Stuff

This is a fun felt camera. Which is a great idea because my little one loves to play with my camera and now he can have his own to play with and I don't have to worry about him breaking it!

More fun Felt electronics. Really these are all cases but if you fill them with stuffing and sew them up. They are fun "knock offs" for the kidos to play with.

Felt Grocery Sets


So cute I love all of these!

Fun Felt Sets

MOVIE PACK- Popcorn, drink, M&M's and Mars bar

TEA PARTY- Tea cups, Tea kettle on a Tea Tray

DOCTOR BAG

POTS & PANS SET

CHEIF COOKING KIT

BBQ SET- Grill, tools, steak, hamburger and hotdog

Flannel Board Story Box


InstructionsThings You'll Need:
Clean pizza box or other sturdy box with a hinged type lid.
Felt.
Tape measure.
Scissors.
Hot glue gun.
2 hot glue sticks.
12" dowel rod.

Step 1:Measure the top of the pizza box. Cut a piece of felt using measurements.

Step 2:Position the closed box with lid hinged in the back. Starting with the top left, glue the felt to the top of the box, and press felt firmly to box. Use extra glue on corners and a large dot in the center. For the most secure hold, put the line of hot glue ¼ -⅛" away from the edge of the box.

Only glue up to 12" at a time to keep the glue from cooling too fast.

Step 3:Trim away excess felt.

Step 4:Use a 12" dowel rod to prop up lid when telling a flannel board story. Use the inside to store dowel rod and flannel board pieces when not in use

Lap Flannel Story Board


Things You'll Need:
Old pair of adult blue jeans.
Scissors,
Tape measure.
Felt,
Thread,
Sewing machine.
Iron.
Pins.
Iron on pellon.
60" length of bias tape.

Instructions
Step 1:Cut open a leg of the blue jeans. Cut a rectangle 20" x 9" from the denim. If there is not enough material, adjust pattern as needed. Cut out one of the back pockets.

Step 2:Cut 20" x 9" pieces of felt and iron on pellon. Iron pellon to felt to help felt hold shape and keep from stretching.

Step 3:Lay denim face down. Place felt on top with pellon in center. Pin together. Sew around edges using a ¼" seam allowance. Trim edges.

Step 4:Fold in half and mark fold with pins or chalk. Sew marked line to create a spine for the lap book.

Step 5:
Sew bias tape around edges of lap book. Trim threads.

Step 6:On the front, hot glue blue jean pocket. Use to store flannel board pieces when not in use.

Fun stories to make for your flannel board:
Hey Diddle, Diddle
Print out, laminate and apply felt or sandpaper to the back of figures of a cat, fiddle, cow, moon and dog. You can find templates online or draw or trace the figures directly onto felt and cut them out. Introduce the figures one at a time as you say each verse. For example, bring the cat out, then the fiddle. Place them to the side of the board and bring out the cow and the moon, and so on until you finish the rhyme.
Peter, Peter Pumpkin Eater
Re-enact this nursery rhyme using a large pumpkin flannel board piece, a figure of a man (Peter) and a woman (his wife). Hide Peter's wife under the pumpkin when you get to the end of the rhyme, which describes him putting her in a pumpkin shell.
Pussycat, Pussycat
Make flannel board figures of the queen, cat, chair and mouse. For maximum durability, print the figures onto card stock or another sturdy paper. Recite the story, hiding the mouse under the chair and performing other actions along with the rhyme. Let the children take turns telling the story from different perspectives such as that of the mouse or the queen.
Georgie, Porgie
Print out or make several boy and girl figures, as well as images of puddings and pie (since he's "Georgie Porgie, Pudding and Pie"). Make sure you add large lips to the two main characters so that Georgie can bestow kisses. Start with one figure of a boy "Georgie" (surrounded by a pudding and pie) and one figure of a girl. Add more boys and girls to the board when you come to the part of the rhyme where "the boys came out to play." Make Georgie disappear when other children appear.
Three Little Kittens
Create flannel board figures of three cats and three sets of mittens. Be sure the cats are large enough to wear the mittens. Color the cats in shades of white, brown, black or gray and the mittens in primary colors. Recite the rhyme once or twice in its original form, then add colors into it, such as "One little white kitten lost his blue mitten and he began to cry...."

Burlap Heart Wreath


Supplies for 1 wreath
1 metal hanger

12" X width of burlap (my burlap was about 50" wide)

glue gun

a rotary cutter to make cutting the strips easier

dental floss

Instructions
Cut 3 - 4" X about 50" burlap strips. Sew these three pieces together, so you have one long strip. To gather the burlap, machine zig zag stitch over dental floss. I used red cinnamon flavored floss so it wouldn't show, even though it looks white in the picture. Pull the floss and gather the burlap.

Bend 1 wire hanger into a heart shape
Adjust gathers to fit around frame, cutting off any extra that isn't needed. Hot glue to wire frame. I used clear fishing line to hang, but a pretty white bow would be nice.

bright