Showing posts with label Cake. Show all posts

Wednesday, May 9, 2012

R2-D2 Cake

This last minute cake ended up being a lot of fun and I couldn't stop humming the Star Wars theme song as I was working on it! As I was taking a vacation visiting family I was asked to make a cake for the little boys cousins combined birthday party. Since it was Star Wars themed I let my creative juices flow for a while and then came up with this idea. My first though was to create a full R2 but since I was on vacation and I didn't have my cake stuff I decided to scale it down a bit! This is the fastest specialty cake I have ever made thanks to the help of my hubby and momma who helped me color fondant, watch the kids and cut some shapes for me. Since this was for kids I let my son pick the cake and of course he picked funfetti cake and we added chocolate chips to the filling. Everyone loved this cake and didn't realize it was a cake until is was pointed out to them. LOL. I really enjoyed make this cake and the kids really loved how it looked and tasted!

Chocolate cake!

I seem to do a lot of farewell cakes and here is another one. This is a very simple one tier very chocolate cake. The cake is covered in my own very chocolate cover with chocolate pieces and a chocolate squiggly on top.
Inside is fudge chocolate cake with a whipped chocolate gaunache. I wasn't there for the farewell party but I was informed it was gone before the party was over!

Flamingo Farewell Cake

I made this cake as a farewell surprise for a Cpt in the Army who had finished her time and was getting out. She really likes Flamingos and chocolate. The the outside was covered in green and blue to represent the environment where flamingos live. I added green reeds/leaves and then flamingos as well as big letters spelling farewell. The flamingo on top was on it's own until I had an accident with the cake and ended up having to cover the mis-happ with blue (pond like) Fondant. Inside was chocolate cake with gaunache and then the top tier was yellow cake with buttercream frosting with chocolate chips! Everyone loved it and ate it up fast!

Sunday, January 22, 2012

Pineapple upside cake Twist


Since my hubby has become social event person at his work, it means that i have become the social event dessert provider. So for this fun twist on Pineapple upside cake I actually used pineapple juice in the mix for the batter. Using one of my favorite cake and cupcake recipe books (101 gourmet cupcake recipes in 10 minutes) I mixed, baked and decorated a dozen cupcakes and a cake as well. Since I was feeding a good amount of people I made the cake sized version. Everyone loved it and wanted more and I could make it even with two toddler's running around me. And that is tell you something! Here's to Cake!

101 Gourmet Cupcakes


This has become one of my favorite cupcake/cake recipe books. These are fun, quick and easy ways to add to boring cake mix. I absolutely love 101 gourmet cupcake in 10 minutes book and am so grateful for my wonderful mother who send this to me. Since my hubby has become social chair at work I have become the dessert lady. Bring all kids of cakes, brownies and pies. Since I try to bring a different dessert each time I am starting to run out of ideas. But thanks to this wonderful book I have a ton of seasonal, occasional and just fun ideas! Love it and would totally buy it if I didn't have one already!

Saturday, December 24, 2011

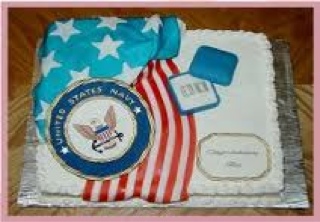
Promotion cakes

Being in the military promotions happen and refreshments need to be made. So what better way to celebrate and feed people at the same time than a cake. Here are few really good ideas for a patriotic cake.

Wednesday, December 14, 2011

Candy cane popcorn gifts

For my hubby's work I needed something easy to make and fairly inexpensive. Since he request 20+ this year, i knew that it was going to be simple but I still wanted it to fun. I found cute little popcorn holders in the dollar section at target and then found a yummy popcorn treat recipe online. Candy cane popcorn is fast and easy to make plus my 3 year could help me make it. Which is always a plus!
To make Candy cane Popcorn:
You will need;
2 bags popped popcorn
1 bag white chocolate chips
6 crushed candy canes
First place the candy canes into at least two bags. Then crush the candy canes. We used a pot because my kids had a good time banging it. Second pop the popcorn and then pore into a big bowl. Then Melt the chocolates according to the bag and pore over the popcorn. Mix the chocolate and popcorn slightly and then add the crushed up candy cane. Mix some more and then pore onto wax paper and spread out to cool/harden.

I placed the popcorn treat in dessert bags and then into the popcorn holders and then finally attached a tag that said, "Merry Christmas and a POPPING New Year!"
It was a hit and everyone loved the yummy popcorn. In fact I had a ton of people beg for the recipe.

Wednesday, May 26, 2010

Beach party Cake/cupcakes


For my sons second birthday we did a beach party theme. So I decorated these cupcakes and cake with blue frosting for water, crunched up Nilla Wafers, gummies and little drink umbrellas too! Everyone enjoyed them and they looked really good!
 
Posted by Picasa

Thursday, February 18, 2010

Marshmallow Fondant

MM or Marshmallow Fondant is easy to make and to use. Here is the recipe that I use! It is sticky but adds just a little bit of fanciness to a cake.

Makes: Enough to cover 2 cakes Total Time: 30 min

what you need
•1 bag of mini marshmallows
•1 (2lb) bag powdered sugar
•1/2-2 T Water
•1/2 cup solid vegetable shortening
Make it
First cover a thick layer of veggie shortening on the counter where you will be working. Then pour 1/2 of the powdered sugar onto of the greased area. Melt marshmallows and tablespoons of water in a microwave: Put the bowl in the microwave for 30 seconds, open microwave and stir, back in microwave for 30 seconds more, open microwave and stir again, and continue doing this until melted. It usually takes about 2 minutes total. Pour the melted marshmallow on top of the pile of powdered sugar.

Now grease your hands GENEROUSLY (palms, backs, and in between fingers).
Start kneading like you would bread dough. You will immediately see why you have greased your hands.

Keep kneading, this stuff is sticky at this stage! Add more powdered sugar as you good and knead some more. Re-grease your hands as needed. If the mix is tearing easily, it is to dry, so add water (about 1/2 tablespoon at a time and then knead it in). It usually takes me about 8 minutes to get a firm smooth elastic ball so that it will stretch without tearing when you apply it to the cake.

It is best if you can let it sit, double wrapped, overnight (but you can use it right away if there are no tiny bits of dry powdered sugar). If you do see them, you will need to knead and maybe add a few more drops of water.

Prepare the fondant for storing by coating it with a good layer of veggie shortening, wrap in a plastic-type wrap product and then put it in a re-sealable or Ziploc bag. Squeeze out as much air as possible.

MM Fondant will hold very well in the refrigerator for weeks. If I know that I have a cake to decorate, I usually make two (2) batches on a free night during the week so it is ready when I need it. Take advantage of the fact that this fondant can be prepared well in advance

Tuesday, January 26, 2010

Football Fun

Football wall game

What You Need
Poster board
Brown card stock
White opaque paint marker
Poster tacks
Blindfold
Instructions
For the game pieces, first create a goal post from two-inch-wide strips of poster board. (The uprights and the crossbar are each 20 inches long, and the post is 6 inches tall.) We attached ours to the wall using poster tack.

For the footballs, cut 5-inch-long shapes out of brown card stock. We found some in the scrapbook aisle of our craft store that looks like football leather. Use a white opaque paint marker to decorate and add players' names to the footballs. Put a blob of poster tack on the back of each one.

Players line up about six feet away from the goal. One at a time, each player is blindfolded, spun around three times by another person, and set loose to try to stick their football between the uprights. (No reaching out your empty hand to feel the wall.) Play several rounds with 3 points awarded for each field goal. Highest score wins.

Football Floor Pad

Materials
Scissors
1/2 yard of brown vinyl
12- by 20-inch piece of 1-inch-thick high-density foam (available at fabric stores)
Hot glue
Clothespins
2 yards of 1/2-inch-thick white twill tape
Instructions
Cut two 22- by 14-inch football shapes from the vinyl. Then cut out a foam football that's an inch smaller all around and sandwich it between the vinyl pieces.
Hot-glue the vinyl edges together, using clothespins to hold them in place while the glue dries.
Glue on pieces of twill tape for laces, as shown

Yummy Football Cupcake

Just make a cupcake and decorate it with green frosting and then put white stripes across like lines. Make a flag using a stick pretzel and cut a flag out of fruit roll ups. The football is a chocolate almond with white frosting on them.

Football Game made out with a pencil

Materials
Oval bead (ours was 3⁄4 inch long)
Brown and white acrylic paint
Scissors
2 flexible straws
Unsharpened pencil
Green floral tape
Glue
2 small pom-poms
String
Instructions
First paint the bead with brown and white acrylic paint to resemble a football, and allow it to dry.

Cut a 6-inch section from the top of each of the flexible straws. Secure the longer ends of the straw pieces together by cutting a slit in one straw and slipping the other one inside it.

Secure the midsection of the straws to the eraser end of an unsharpened pencil with green floral tape, then bend the ends to form a U. Glue 2 small pom-poms to the ends of the straws and let the glue dry.

Tie the football bead to one end of a 12-inch length of string and tape the other end to the pencil, about 2 1⁄2 inches up from the bottom. Cover the rest of the pencil with more floral tape. To play, try swinging the football through the uprights to score a field goal

Sunday, January 24, 2010

Cake- Flowers and Family


This is a butter cream cake which is really colorful because I wanted to use the rest of my frosting. I really liked this cake but didn't have time to finish the family's faces or hair. O well! LOL It is still cute!
Posted by Picasa

Friday, January 1, 2010

Cake- Buttercream Rainbow


This is a picture of my butter cream cake that I decorated in one of my classes. The rainbow was fun with many colors and then I added the beginnings of a family. I didn't have the time to finish them so they don't have hair or faces. LOL O well maybe next time!

The second picture is a close up of the edging.

Cake- MMF Second Attempt


This is my second attempt and making and decorating with MMF (marshmallow fondant). I really enjoy making the MMF and my son likes to help eat it. This time I decided to make mini-cakes so that I would have more chances to decorate. I colored the fondant several colors and then used a circle cutter to create dots of different sizes on the cakes. I think they ended up pretty cute! I gave them away to the ladies I visit teach. They smiled when they saw them and seemed to enjoy them as well.

Cake- BYU and White Roses


Learning to decorate cakes is so much fun. Here are two more cakes that I just finished. The first is a white cake with a fun trip and white roses on it. The other cake was a lot of fun and was made for a BYU football game party. I used the star tip and made a big Y. Everyone seemed to like the look and taste of it. Cake making is so much fun!

Marshmallow Fondant Cake

After watching all those fun cake show for a while I started to get that "I can do that!" bug in me. So I signed up for some classes and even before that I tried some experimenting on my own. These are my first time making and decorating with MMF (Marshmallow Fondant). It was fun and making the fondant really helped me get out some frustration. It was sticky, messy and yummy all at the same time. In the end not the best cake but I didn't have a lot of time to play with. My first experience has taught me a lot and I cannot wait to try again. But first we have to finish eating the first cake. LOL! My hubby and I might have to go on a lot of walks while I am going through this new hobby!
To make MMF:
Ingredients:
One bag of Mini-Marshmallows
2 Tablespoon of water
One Microwaveable Mixing Bowl
A Microwave
A 2 pound bag of Powered Sugar
A Can of Shortening

Directions:
1. Put a good sized pile of Powered Sugar on the counter
2. Place the bag of marshmallow in the bowl and add the water.
3. Microwave for 30 Second and then stir
4. Repeat for 2 minutes or until Marshmallows are completely melted
5. Poor melted Marshmallows over Powered Sugar
6. Knead Marshmallow and Sugar together
7. Keep adding sugar until it becomes dough like

Storage:
Spread shortening all over the finished ball of dough like fondant and then wrap completely around with clear wrap. Place in a Ziploc bag and then store at room temperature.

Saturday, October 24, 2009

Halloween


Our Elmo pumpkin was a really big hit. All the little ones loved it and we go so many comments on it from adult and teens too. It even won 1st prize at our ward pumpkin carving contest even though we didn't really carve it.
 

This cake I made without any of my tools. I made this cake while visiting family members, and it just happened to be my sister-in-laws birthday. So I made the cake for the party. Here birthday is close to Halloween and she would always go Trick-or-Treating for a birthday party activity. So I only thought it appropriate to do a Trick-or-Treat bag with candy falling our of it. Not bad for having to throw this together last minute and without any of my decorating tools!
Posted by Picasa

bright