Showing posts with label Home Made Gifts. Show all posts

Tuesday, December 27, 2011

Army Family signs

I really like these and someday when I have time will make one for our family. I think I might add a quote to it though, "if the army wanted you to have a family, they would have issued you one."

Saturday, December 24, 2011

Crayon monster!

I saw this fun idea in the oriental trading catalog. I thought it was such a wonderful gift idea that I ran out and bought all the items I would need to make it. Now I just need the time! LOL. Until I make my own here is a picture from the catalog.

Duck tape in a new way!

Here is a fun and new way to use duck tape! These would be great gifts for those card Teenagers. All you need is duck tape of different colors and some creativity!

Wednesday, December 14, 2011

Candy cane popcorn gifts

For my hubby's work I needed something easy to make and fairly inexpensive. Since he request 20+ this year, i knew that it was going to be simple but I still wanted it to fun. I found cute little popcorn holders in the dollar section at target and then found a yummy popcorn treat recipe online. Candy cane popcorn is fast and easy to make plus my 3 year could help me make it. Which is always a plus!
To make Candy cane Popcorn:
You will need;
2 bags popped popcorn
1 bag white chocolate chips
6 crushed candy canes
First place the candy canes into at least two bags. Then crush the candy canes. We used a pot because my kids had a good time banging it. Second pop the popcorn and then pore into a big bowl. Then Melt the chocolates according to the bag and pore over the popcorn. Mix the chocolate and popcorn slightly and then add the crushed up candy cane. Mix some more and then pore onto wax paper and spread out to cool/harden.

I placed the popcorn treat in dessert bags and then into the popcorn holders and then finally attached a tag that said, "Merry Christmas and a POPPING New Year!"
It was a hit and everyone loved the yummy popcorn. In fact I had a ton of people beg for the recipe.

Tuesday, December 14, 2010

I Spy Bags


I made these fun I Spy Bags for my son's friends for Christmas gifts these years. The were a big hit! I am going to make some more for the cousins too. Everyone seems to love these and they were easy to make too.
Posted by Picasa

Recipe Holder


I needed a few last minute Christmas gifts and came up with this. A few recipe holder held on by a fun magnet. I think the turned out really nice looking and I was able to make them for about $10 each.
Posted by Picasa

Wednesday, May 26, 2010

Capri Sun Bags


1. Buy two/three boxes of Capri Sun drink pouches and drink them.
2. Soak the juice pouches in soapy water to help clean them. Remove the excess liquid from the pouches. Get a dish towel and a rolling pin. Place the towel on a table and put the drink pouch on top of it. Roll the drink pouch flat like you would pizza dough. You need to drink and flatten out approximately 30-40 pouches (depending on the size).
3. Piece together the pattern of the purse. With a sewing machine, sew three/four pouches with the bottom of the pouch to the top of another pouch. This will be the bottom of the purse.
 

4. Sew the pouches together side by side. Repeat that step for the other side of the purse.
5. Sew each side to the middle two pieces of the bottom.
 

6. Bend the end pieces of the bottom up to meet the sides of the purse. Sew the seams closed. This creates a box of Capri Sun.
7. Sew the last remaining pouches together, just like the sides of the purse.
8. Use a ribbon or fabric to make a strap and put snaps on the flap to close the purse.

I also used pouches to make a pocket on the inside and outside of the big bag and an inside pocket on the smaller pink one.

Sunday, February 14, 2010

Valentine Craft


These are two little Valentine craft I did right before Valentines. I first made a valentine heart with an arrow through it and then painted it. I used my cricut and cut out the word Love and then placed it on the heart. Kind of cut I think. Next I did this fun love collage as a gift for my hubby. I had such fun making this project. It was so fun to find my old wedding pictures and then to write an article about our wedding morning in a personalized newspaper. I got this great idea from a blog called mod podge rocks. Happy Valentines!

Monday, January 25, 2010

Marshmellow Gun


Things You'll Need:
For eack marshmallow gun:
about 3 feet of 1/2 inch diameter PVC pipe, thick walled, (schedule 40)
PVC pipe fittings:
two 90 degree elbows
two "T" connectors
two caps
a hack saw or PVC pipe cutter

Instructions:
Step 1: Marshmallow gun drawingClick on the picture of the gun. Take a quick look at the drawing. Get an idea of how to assemble the marshmallow gun. Make a list of the supplies you will need. Take a $10 bill and head for the hardware store.

Step 2: PVC Pick up a 10' piece of 1/2" schedule 40 PVC pipe: usually under two bucks.
For 3 marshmallow guns get connectors: 6 "T" connectors, 6 90 degree elbows, and 6 caps. Each connector costs about 30 cents. Total cost for PVC pipe and connectors for 3 marshmallow guns = $8.40

Step 3: PVC Elbow connectorBring your supplies home and cut your PVC pipe. For each marshmallow gun you will need:
- 2 7" lengths of pipe
- 5 3" lengths of pipe
The easiest way to cut PVC pipe is with a PVC pipe cutter, but I used a chop saw. A hack saw will work just as well.

Step 4: PVC capAssemble the marshmallow gun, as shown in the drawing. You don't need any glue or special tools. You just push one piece into the next. Resist the urge to glue the pieces together. If, by chance, a marshmallow gets stuck in the gun, you can easily disassemble and remove your stray ammo.

Step 5: To shoot the gun, place one marshmallow just inside the mouthpiece. Seal your lips around the mouthpiece and give a good hard puff. You will be amazed at how far you can shoot a marshmallow with one of these guns. Get in a little target practice before you engage in MARSHMALLOW WAR!

Step 6: Feel free to trick out your weapon with a laser site or camo paint. You and your friends or kids will have a blast with this inexpensive, incredibly fun toy gun!
*****
There is a really good tutural at theidearoom.blogspot.com on how to make a mini-marshmellow gun and eye mask. It is really cute!

Travel Felt Board


Directions:
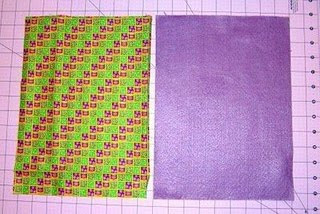
It's not really a board, rather it's a piece of fabric I backed with iron vinyl and then sewed to a piece of felt. The vinyl is essential to keep the backside from getting all dirty, especially at restaurants while we wait for our dinner at fancy shmancy places like Chilis, because I really don't want every meal out to come on a plastic tray!

To make one is really simple and I've improved the design since making mine to include a ribbon closure:

Cut a piece of fabric to the same size as your piece of felt, I just used the very inexpensive felt sheets that come pre-cut. They are the perfect size for rolling up and keeping in your bag without taking up too much room.


Cut piece of iron on vinyl to the same size as your fabric. Follow the directions on the package and iron onto the right side of the fabric. Let it cool off before moving on.


I found iron-on vinyl sold by the roll in a plastic bag on the notions wall at Joann's Fabric, a large nationwide fabric and crafting retailer. Watch for special sales where the entire notions wall is 40-50% off and same yourself some money!
----
Pin and sew vinyl covered fabric to felt, with vinyl covered side facing the felt. Before beginning attach ribbon.

On one side pin a piece of ribbon folded in half so that the loose ends are sandwiched inside between the vinyl covered side of the fabric and felt. Leave a bit of the loop formed when folding the ribbon in half sticking out between the pieces of fabric. When you are sewing around your "board" catch the ribbon and sew firmly into place by sewing over, back-stitching, and then forward stitching over it. This will become your tie.

Turn inside out and sew opening shut. My beginner skills are evident by the obvious stitching up the bottom right side on the one above but it still looks cute all rolled up! Use fabric scraps to make the felt shapes and you're in business! Your toddler is kept busy, and when she's all done just roll up the whole thing, tie closed, and now you don't even need a plastic bag to keep it in!


Found this great idea at katiesnestingspot.blogspot.com

Pencil & Drawing Pad Holder

This is a fun colored pencil and drawing pad holder made from an old pair of jeans. This is a such a cute idea. You can get more images of how to make it at www.skiptomylou.org
Inside with plenty of space for all the pencils and a note pad.

Rolled up Kitchen Mat


Materials:
A piece of wool felt 17.5″ x 9.5″. (Two pieces if you’re going to be hand sewing. Just one if you’re machine sewing.)
A piece of cotton print fabric 17.5″ x 9.5″. (Skip this if you’re hand sewing.)
A 23″ long length of ribbon.
Assorted wool felt scraps for the burners, knobs, sink, and faucet pieces. See pattern for how large the pieces are.
Matching thread.
embroidery thread for hand sewing the kitchen items onto the playmat and/or hand sewing the playmat to its backing


1. Cut & Pin:

Cut the burners, knobs, faucet pieces, and sink out of your choice of wool felt colors and arrange on your 17.5″ x 9.5″ piece of wool felt. Make sure you leave enough room around the edges for sewing the playmat to its backing, you want there to be a bit of a border left after you sew, plus allow for the 1/4″ seam allowance (if you’re machine sewing).

Pin in place… I know my printed fabric is shown underneath in the photo, but ONLY pin through the wool felt. (And only pin through ONE layer of wool felt if you’re hand sewing everything.)

Sew the kitchen elements on
You can sew the kitchen pieces to the wool felt however you wish. My new sewing machine has a blanket stitch so I used that. You can just do a straight stitch or a zig zag if you’d like. Sewing wool felt pieces by hand is quite enjoyable if you like handiwork. You can use embroidery thread and stitch everything on by hand either by a running stitch or a blanket stitch, however you wish.

2. Stitch playmat and ribbon tie
After all the kitchen elements are sewn on, you’re going to want to stitch the playmat to its backing.

If you’re sewing with a machine:
Lay your wool felt playmat piece right sides together on top of your printed cotton fabric and square up the edges if you need to

Pin pieces together inserting your ribbon folded in half on one short end. Most of the ribbon should be inside the playmat pieces, pin it in there if you’re afraid of accidentally catching it in the stitching

Using a straight stitch, sew around the edge of the playmat with a 1/4″ seam allowance. Leave a 3 or 4 inch opening to turn the playmat right side out.

Clip corners and turn the playmat right side out. Use your fingers or a chopstick to poke the corners out. Iron on a warm setting if needed.

Fold the edges of the opening in, pin. Topstitch close to the edge closing the opening and going all around the edge for a neat look.

If you’re hand sewing
Lay your wool playmat piece with the kitchen elements sewn on, on top of another wool piece of the same size face up — wrong sides together. Square up if needed. Using embroidery thread, sew pieces together either with a running stitch or a blanket stitch. Your stitching will show, so if you do a running stitch, do it fairly close to the edge. Wool felt won’t fray, so don’t worry.

Don’t forget to insert your folded ribbon between the layers (folded end hidden between the layers, loose ends free to tie the roll up), on one short end of the playmat and stitch it tightly in place
******************************************
That’s it! You’ve got yourself a sweet little portable play kitchen for hours of creative play for your little ones. These would make very cute handmade Christmas gifts with a wee wooden spoon and a tiny pint-sized pan or two

alterations, changes
I always recommend using wool felt over the thin, acrylic stuff you can find in craft stores. It just holds up so much better folks. Wool blend felt is perfectly okay! If money is really tight, anything that won’t fray easily like polyester fleece would work as well. You could also make the whole thing out of cotton prints with some iron-on fusible webbing (like Wonder Under), easily found at fabric stores. You’ll just want to sew the edges down VERY WELL to avoid fraying.

You can also take it a bit further, and embroider “hot” and “cold” onto the faucet knobs, or maybe “on” and “off” on the burner knobs. It would be cute to do a red spiral stitch on the burners or even a red spiral bit of wool or fleece to make the burners look hot.

You could add a splash or a drip of water under the faucet… add a drain or some bubbles in the sink… embroider a little 3D sink action… there are lots of fun possibilities!

Found this great idea from www.balancingeverything.com

Sunday White Shirt & Tie for Baby Boy


This are so darn cute! I just love these. I can't wait to get my sewing machine fixed so I can make a ton of these to give as baby shower gifts. It is really simple to make even though if you try to buy them you will be paying at least $20. Which is rediculus! All you need is a plan white onesies, some fun fabric, wonder-under and a sewing machine. Just create a tie like pattern on some card stock and then cut out the fabric using that same shape. Iron on the wonder under to the fabric and then iron on to the shirt. To make sure the fabric doesn't come off of the shirt just stitch around the tie. It looks really good if you do a really tight zizac.

Crayon Rolls


This is easy to make and its nice to have a place for each crayon. Its also nice because you can figure out quickly if you are missing one. This is a really cute idea and great for taking crayons on the go with you!
You could make this for markers if you wanted to, just make each little pocket bigger.

Sunday, January 24, 2010

Take a long Chalk Board


This is a picture of a take along chalk board that my mother made for my son. I just love it and he does too! It is a really great activity for him to do when he needs to sit still and be quiet (like at church). I just love this idea and it is great to have the erase attached as well as a pocket to put the chalk in. That way you don't have to search around for those supplies. I LOVE THIS!
Posted by Picasa

Easy Christmas Gift Ideas


This is a fun idea where you take a Chinese take out box and fill it with fortune cookies. Then add chop sticks and fun ribbon or raffia as well as the saying," We are so fortunate to be your Friend" or some thing like that.
 

The second gift is a shaker full of sprinkles with the saying, "Sprinkles...because its easy to add a bit of magic"
 

The last one is a fun colored reusable shopping bag attached is the saying, "May the New Year bring you all the joy you can carry."

Friday, January 22, 2010

Gifts in a Jar


1. S’mores in a Jar
Kids love to help make and eat S’mores in a Jar. If you’re into seasonal gift recipes, find some marshmallow Peeps to match your holiday.

Or get fun and use teddy bear graham crackers to line the jar for decoration.

Ingredients:
Layer in a large wide mouthed 1 quart mason jar:

1 1/2 cups graham cracker crumbs (one sleeve of crackers, crushed)
1 1/2 cups miniature marshmallows.
Or substitute with 8 Peeps and 1/2 cup miniature marshmallows for seasonal fun. Line the jar with Peeps facing out.
1 1/2 cups chocolate chips or mini Hershey Kisses or M&M’s
1/3 cup brown sugar
________________________________________________________________________

2. Oatmeal Chocolate Chip Cookies in a Jar
This recipe makes about 36 cookies.

Ingredients:
Layer in a large wide mouthed 1 quart mason jar:

1 cup all-purpose flour
1/2 tsp baking powder
1/2 tsp baking soda
1 1/4 cups rolled oats
1/2 cup white sugar
1/2 cup brown sugar
1/2 cup chopped nuts
1 cup semisweet chocolate chips
Mix flour, baking powder, and baking soda. Pour mixture into a 1 quart (1 liter) mason jar and pack down. Mix oatmeal in a blender. Pack on top of flour in mason jar. Add white sugar and pack down. Add brown sugar and pack down. Layer chopped nuts on top of brown sugar. Finish layering jar with mini or regular chocolate chips.

_______________________________________________________________________
3. Ultimate Chocolate Brownie Mix in a Jar
This recipe makes one pan of chocolate brownies.

Ingredients:
Layer in a large wide mouthed 1 quart mason jar:

1 cup all purpose unbleached flour
1/2 tsp baking powder
1/4 tsp salt
1 1/2 cups vanilla sugar
1/4 cup unsweetened cocoa powder
Any combination of: mini chocolate chips, mini M&M’s, junior mints, chocolate candy bar
1/2 cup almonds
Layer ingredients in 1 quart mason jar. Tap gently on the counter after each layer before adding the next. Add additional mix-ins to fill any small gaps if necessary.

______________________________________________________________________

4. Chocolate Chip Muffins in a Jar
This recipe makes a single batch of muffins.

Ingredients:
Layer in a large wide mouthed 1 quart mason jar:

1/3 cup sugar
2 cups all-purpose flour
1 teaspoon salt
2 teaspoons baking powder
1 cup chocolate chips, or substitute raisins, dried cranberries, or nut.
Combine sugar, flour, salt, and baking powder. Place in quart mason jar. Add chocolate chips.
________________________________________________________________
6. Chicken Noodle Soup in a Jar
This recipe makes a pot of soup.

Ingredients:
Layer in a 1/2 quart (2 cup) glass jar:

1/4 cup of red lentils
2 tbsp dried onion flakes
1 1/2 tbsp chicken bouillon granules
1/2 tsp dried dill weed or dill seed
1/8 tsp each celery seed and garlic powder
1 cup medium egg noodles
1 bay leaf
In a 2 cup glass jar, layer from bottom in the order listed above.


printable gift tags at:
www.squawkfox.com

Stirring Up Snowman Chocolate Spoons


Supplies for Hot Chocolate Spoons:
- spoons, plastic work best
- chocolate chips, regular and mini chips
- marshmallows
- coconut, shredded and sweetened
- peanut butter chips
- butterscotch chips
- crushed candy canes
- wax paper
- plate


Have your supplies out ready to go. Heat up your chocolate chips for spoon dipping first. Place a 1/2 cup of chocolate chips in a microwave safe bowl and microwave for 1 minute. Take it out and stir, then continue to heat it for 20 second intervals until melted.

Once your chocolate is melted, dip your spoon into the bowl. You'll need to stir it around and turn it over to make sure you've got it all covered in chocolate. Then set the spoon onto a plate covered in wax paper.


When you've got your spoons dipped, it's time to decorate them. For the snowman, place 3 marshmallows in a line down the spoon. I topped one with a peanut butter chip for the hat and a flake of coconut for the scarf. Then two mini chocolate chips get a tiny dip of melted chocolate on the bottom of them before you place it on the top marshmallow for the eyes. Cute

We made a few different kinds of dipped spoons. One is dipped in melted peanut butter chips with mini chocolate chips all over. We call that one the "chocolate chip cookie" dipped spoon, and it is my favorite one dipped in hot chocolate! We also sprinkled coconut on one to look like snow. Melted mint chocolate with crushed peppermint on another, and a melted butterscotch chips spoon with drizzled chocolate on the top. Mmm,

Once you've got all your spoons dipped and decorated, let the chocolate harden again. It goes by pretty fast if you place your waxed plate in the fridge for about 15-20 minutes. Then they're ready for dipping in hot cocoa, or even your hot milk. The snowman one was our favorite to dip. He went for a big swim in chocolate. He was going

Tuesday, January 5, 2010

Tissue Case- Get Better Soon!


Perfect as a favor for guests who are busy wiping runny noses when not attending showers. These felt cases hold travel packs and can be attached to a stroller or car seat with double-sided mounting tabs. To make one, cut a 6 3/4-by-5 7/8-inch rectangle from felt, fold short ends in to meet at center, and pin. Sew sides shut with a 1/2-inch seam allowance, and trim with scallop or pinking shears; adhere mounting tab to back side.

Hot Chocolate on a Stick

The trick to making the best hot chocolate on a stick is using good, serious chocolate that melts easily. A chocolate with at least 70% cocoa butter will do that. More cocoa butter means quicker melting. A bag of every-day chocolate chips won’t melt as fast. You can also find fake chocolate (like a bag of Wilton’s candy melts), which uses vegetable oil instead of cocoa butter. It will melt well, but the resulting cup of hot chocolate won’t be as transcendent. And we’re going for transcendent here. If you really want to go gourmet, use couverture (the chocolate made for dipping truffles), and don’t just melt your chocolate, temper it. But for me, a quick trip to the Winco bulk foods isle to pick up some Guittard chocolate wafers was good enough.
Hot Chocolate on a Stick
Yield: 10 cubes of hot chocolate (ice-cube-tray size)
(use 1 oz. hot chocolate on a stick per every 1 cup milk or cream)

Equipment:
Ziplock bags or piping bags
A double boiler or pan with a glass bowl that can sit over the simmering water
Some kind of chocolate mold, ice trays work great
Stir sticks or a bag of wooden craft sticks like I used (available at any craft store)
Ingredients:
8 oz. chocolate (with at least 70% cocoa butter, see note above), bittersweet, semisweet, milk, and white chocolate all work
1/4 cup cocoa, Dutch processed if possible, sifted
1/2 cup confectioner’s sugar, sifted
pinch of salt
6 cups milk and 2 cups heavy cream if you plan to enjoy these right away
Method
1. If your chocolate is in a block, chop it into meltable pieces. Simmer a couple inches of water in a pan and place glass bowl over the top to make a double boiler. Be sure the bottom of the bowl does not touch the water beneath it, and regulate the heat so the water stays at a simmer. Dump chocolate into the clean, dry bowl and stir as the chocolate melts.
2. Once the chocolate is 2/3 melted, with just some pieces of the chocolate unmelted, remove the pan from the heat and continue stirring until chocolate is fully melted.
3. Add cocoa, sugar, and salt and continue to stir until combined.
4. Lift the bowl off the pan and use a towel to dry off any drips of water. Pour chocolate into a ziplock bag and clip off the corner.
5. Pipe the chocolate into your chocolate mold, tapping the mold on the counter to make sure all the chocolate settles into the mold. Add a stir stick and you’re done. The stir stick should stay upright without any trouble.
6. Let the chocolate cool either at room temperature or in the fridge if you’re in a hurry.
7. If you don’t like the look of the chocolate once it is removed from the mold, you can dip the cubes into a new batch of plain melted chocolate for a shinier finish. This also lets you add sprinkles or crushed candy or just lets you dip in fun patterns. I like dipping at an angle into a different color of chocolate.
8. In order to enjoy these, heat up any combo of milk, water, half and half, or cream. I like 6 cups milk with 2 cups heavy cream. One ounce of chocolate on a stick should be melted into one cup milk or cream. So a standard ice cube-tray block, which is 3/4 an ounce, should be melted into a mug with 3/4 cup milk or cream in it.
How to store it: Chocolate will keep in an airtight container for up to a year. Don’t keep it in the fridge because it is really good at absorbing odors.

bright